
Printing Photos from a Computer
This section describes how to print photos with My Image Garden.
-
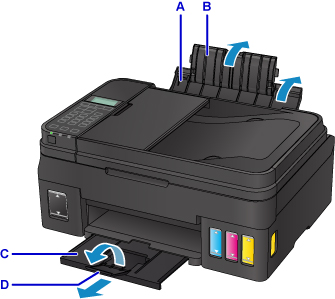
Open the paper support (A) and paper support extension (B).
-
Pull out the paper output tray (C) and open the output tray extension (D).
-
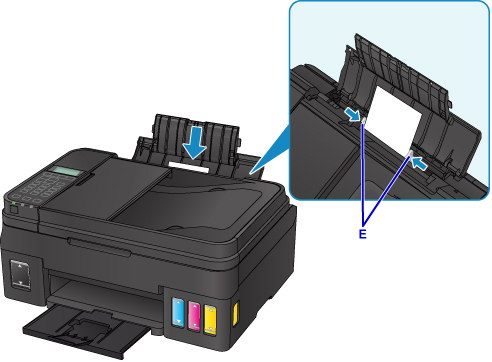
Load paper vertically WITH THE PRINT SIDE FACING UP.
-
Align the paper guides (E) with the paper width.
After loading paper on the rear tray, the paper information registration screen for the rear tray is displayed on the LCD.
-
Press the OK button.

-
Use the

 button to select the size of the loaded paper on the rear tray, then press the OK button.
 Note
Note-
The asterisk "
 " will appear with the current page size and media type settings.
-
-
Use the
button to select the type of the loaded paper on the rear tray, then press the OK button.
-
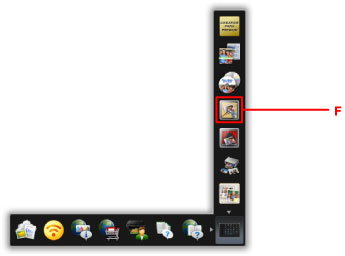
Click the My Image Garden icon (F) in Quick Menu.
The Guide Menu screen is displayed.
 Note
Note- The number and types of icons displayed vary depending on your region, the registered printer/scanner and the installed applications.
-
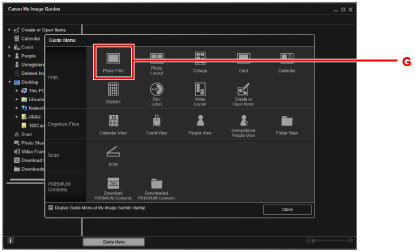
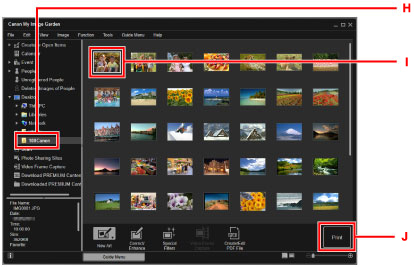
Click the Photo Print icon (G).
-
Click the folder (H) with photos you want to print.
-
Click the photos (I) you want to print.
For Windows:
To select two or more photos at a time, click photos while pressing the Ctrl key.
For Mac OS:
To select two or more photos at a time, click photos while pressing the command key.
-
Click Print (J).
-
Specify the number of copies, your printer name, media type, etc. (K).
-
Click Print (L).
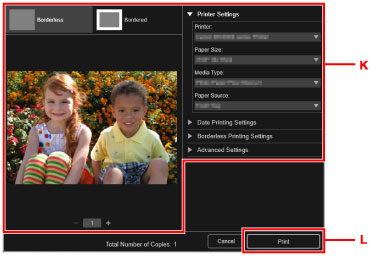
For Mac OS:
Click OK when the confirmation message appears, then click Print.
![]() Note
Note
-
My Image Garden lets you use images on your computer, such as photos taken with a digital camera, in a number of ways.
-
For Windows:
-
For Mac OS:
-
